Tuesday, April 16, 2024

The Aaron Apron

Hi! Hey, it’s been less than three weeks since my last post - don’t faint!! 😅

I recently tested another pattern for Linds Handmade Designs. It wasn’t a bag this time… it was an apron, the Aaron Apron. It’s a really nice utility apron, good for holding lots of project tools. It works really well made from heavier weight fabrics like canvas, waxed canvas, etc., yet is still easy to sew. There are two styles and two sizes (adult and child) included in the pattern. The style options include different pockets and straps. Here’s the pattern cover so you can see the variations.


I made mine out of one of Jess’s older canvas designs from several years ago. The apron was really easy to sew, and I didn’t even print out all the pattern pieces because Linds gives measurements to cut without, saving lots of paper.

I ended up not putting any straps on mine because I didn’t like the webbing I’d planned on using (too thick), plus at this point I don’t know of anyone needing an apron, so it’ll remain strapless unless I find someone to use it. I couldn’t really get a very good photo of it, but here’s one to just give you an idea.


After I was done with that, I suddenly got the idea to make a doll-sized one. I measured the doll and just kinda went with the approximate 30% size that it turned out to be. I did some scrap-busting using fabric that I’d gotten long ago from my mother-in-law (recognize it, Audrey???). The straps are elastic I’d bought for mask making in 2020. I love how it turned out!


I love making doll clothes. I made her entire outfit, including the “clogs”. So fun!

I mentioned in my last post that I was learning and trying something new. I’ve finished it, so if I don’t procrastinate too long, you’ll be seeing it soon (“soon” being relative, of course). I’m very pleased with how it turned out, and I’m sure I’ll be doing that type of project again someday!

Monday, March 25, 2024

Tracy Wristlet

Hmm… I’m getting a bit behind here in posting stuff I’ve completed. Maybe that’s because it’s more fun to sew the things than to write posts about them. :)

Anyway, I’ve tested a couple more patterns for Linds Handmade Designs. She’s such a prolific designer/pattern writer! This is the first of those, which I confess has been completed for a couple of months. It’s the Tracy Wristlet. It was a fun, easy pattern to sew.

I had recently purchased some waxed canvas from Sailrite when they had it on sale. It’s their lighter weight, and it’s very easy to sew. I decided to use my burgundy, and I happened to have a quilt cotton fabric that went perfectly for the lining.


The wristlet went together so smoothly. Here are some progress photos:


I used my faithful old Kenmore for the lining and my Sailrite LSZ-1 machine for the topstitching and heavier seams. I do love the look of its topstitching!


I also love the patina look of the waxed canvas. The more it gets crinkled in working with it, the more design it gets. See? Isn’t it cool?


Of course if you don’t like that look, all you have to do to get rid of it is warm it with a blow dryer. The wax melts and smooths out so the patina look disappears. I had to do some of that next to this blue band on the back of the wristlet because I didn’t think about how the rugged presser foot on my Sailrite would leave tracks on the waxed fabric. So I warmed it, and you’d never know it happened! I also have a knurled foot and a smooth foot for my machine, so I switched to the smooth foot which left no tracks.


Inside the pouch is a slip pocket and slots for cards on one side…


… and on the other side a zipper pocket. Yes, I remembered to add my tag. Linds is good about including a reminder about that in her patterns (thank goodness). :)


So that’s that. It’s a pretty straight forward sew. I do like the band across the back. It has a D-ring at each end, so you can use it to attach not only a wristlet strap but also a crossbody strap or even a waist strap. Linds covered all the bases! You can find the pattern here.

In other sewing, I’ve made a couple (so far) of something I made years ago. I’ll show you them when the whole project is completed, which could be a couple months yet. I’ll show you the other pattern test results in my next post. AND I’m trying something totally new! Yes, it’s sewing, but something I’ve never done before. I’m enjoying it and learning a lot as I go. It’s slow going, so don’t hold your breath for that one yet. :)

Wednesday, February 28, 2024

Courtney’s creations

I promised I wouldn’t wait five months before posting again, and I didn’t, but the time has sure been flying by and I’m so good at procrastinating! 

Soooo… Courtney did some Christmas sewing. She wanted to make a few zipper pouches. Here’s her very-first-ever zipper pouch! She did a fine job!


That fabric was some she chose from my stash. For the rest of the pouches, I happened to have three already cut out for a project I was supposed to sew for Cloud9 Fabrics at one point, with the fabrics being chosen and sent by them. But then they changed their minds and wanted something else, so these fabrics have been sitting for several years, with me thinking I’d still sew them up someday. I didn’t, but it turned out to be a good thing for Courtney. It saved her a lot of time, which was scarce as it was, so all she had to do was the sewing part. So she made 3 more pouches in short order!


Great job again!

Next up was a Christmas gift for her dad. Months ago I’d gotten a tiny ratcheting screwdriver set for myself, mainly for getting at some of those awkward screws on my Sailrite sewing machine. It’s been a great help, and when I showed it to Nate at one point, he said he might need to borrow it sometime. I mentioned it to Courtney, thinking it would be something she could get him for his own, and she liked that idea. 

Then I thought it’d be handy if it had a case to store those little things in. So I made this prototype for my tools so I could get the size down and help Courtney make one.


I’d made it out of waxed canvas. She chose another color of waxed canvas for the one she made, and here it is. She even got the new experience of installing a metal snap.


She sewed that on my Kenmore, so since I needed something to do so I’d be close by in case she had questions while she was sewing, I decided to make another Tiny Bin on the Sailrite machine. I used both those waxed canvas fabrics, and since those are Alex's colors, I gave it to him. Hopefully he found a use for it.


Here it is with my original Tiny Bin. Cute, huh?


Courtney has also taken up crocheting! She’s made so many cute things… I wish I had pics of them all. Here’s what she gave me for this past Christmas - a sea turtle! I think it’s super cute!


The Christmas before, she’d given me a caterpillar, so here are the two friends together. So fun!


She’s also made a walrus, several hedgehogs, a toucan, and a few other things she’s mentioned but I haven’t seen. My favorite of all her crocheted things is a huge lion. It’s so awesome, and she took it to the State Fair last summer and received a blue ribbon! She’s a girl of many talents, and I’m soooo proud of her!

Wednesday, January 10, 2024

The Rosie Sling

I almost gave it up. Blogging. Yesterday. Aside from all the procrastination since my last post, and thoughts of quitting, I trudged on and started this post yesterday, determined to write at least this one more, because this is such a cool bag that I wanted it out there. Then Blogger INSISTED that some of my photos upload sideways. WHY DOES IT DO THAT?!?!???! I wasted so much time fighting it yesterday! Finally a little googling brought me to a solution. It’s rather a pain, but it worked. For each photo that uploaded sideways, I had to go into my photo library, edit the pic to be other than the proper orientation, save it, then go back and edit it again, making it the way I wanted it, then saving it again. Then it would upload correctly. But it had to be the 2-step process; I couldn’t just edit once. So even knowing how to get the pics to upload correctly, it still took a long time because of all the steps it involved. Ugh.

All that aside, here is my last major sewing project, The Rosie Sling, from the pattern by Shannon Timchula of Knotted Threads Co.


I so loved the bag from my previous post and how well-written its instructions were that I decided to get her latest pattern and make that one, too, even though I didn’t have any use for it nor know anyone who did. I sewed it just for the pleasure of doing so, plus I’d heard that Shannon had a fabulous method included for doing binding, and I wanted to learn what it was.

Here are some progress pics. The entire bag, except for the outer layer of the exterior pocket, was made from waterproof canvas. I used fusible foam on the front and back exterior pieces. It wasn’t in the pattern (fusible fleece instead), but Shannon had suggested it in her Facebook group, so I wanted to try it.


(Just a note on fusing to waterproof canvas… the fusible fleece worked just fine, other that wanting to slide around prior to hitting it with the iron. It adhered very well. The foam fused, using a longer time with the iron and quite a bit of moisture, but I found it didn’t stay fused well. I could have easily peeled it off at any point, but I handled it carefully so that it stayed on long enough to get the bag sewn together.)

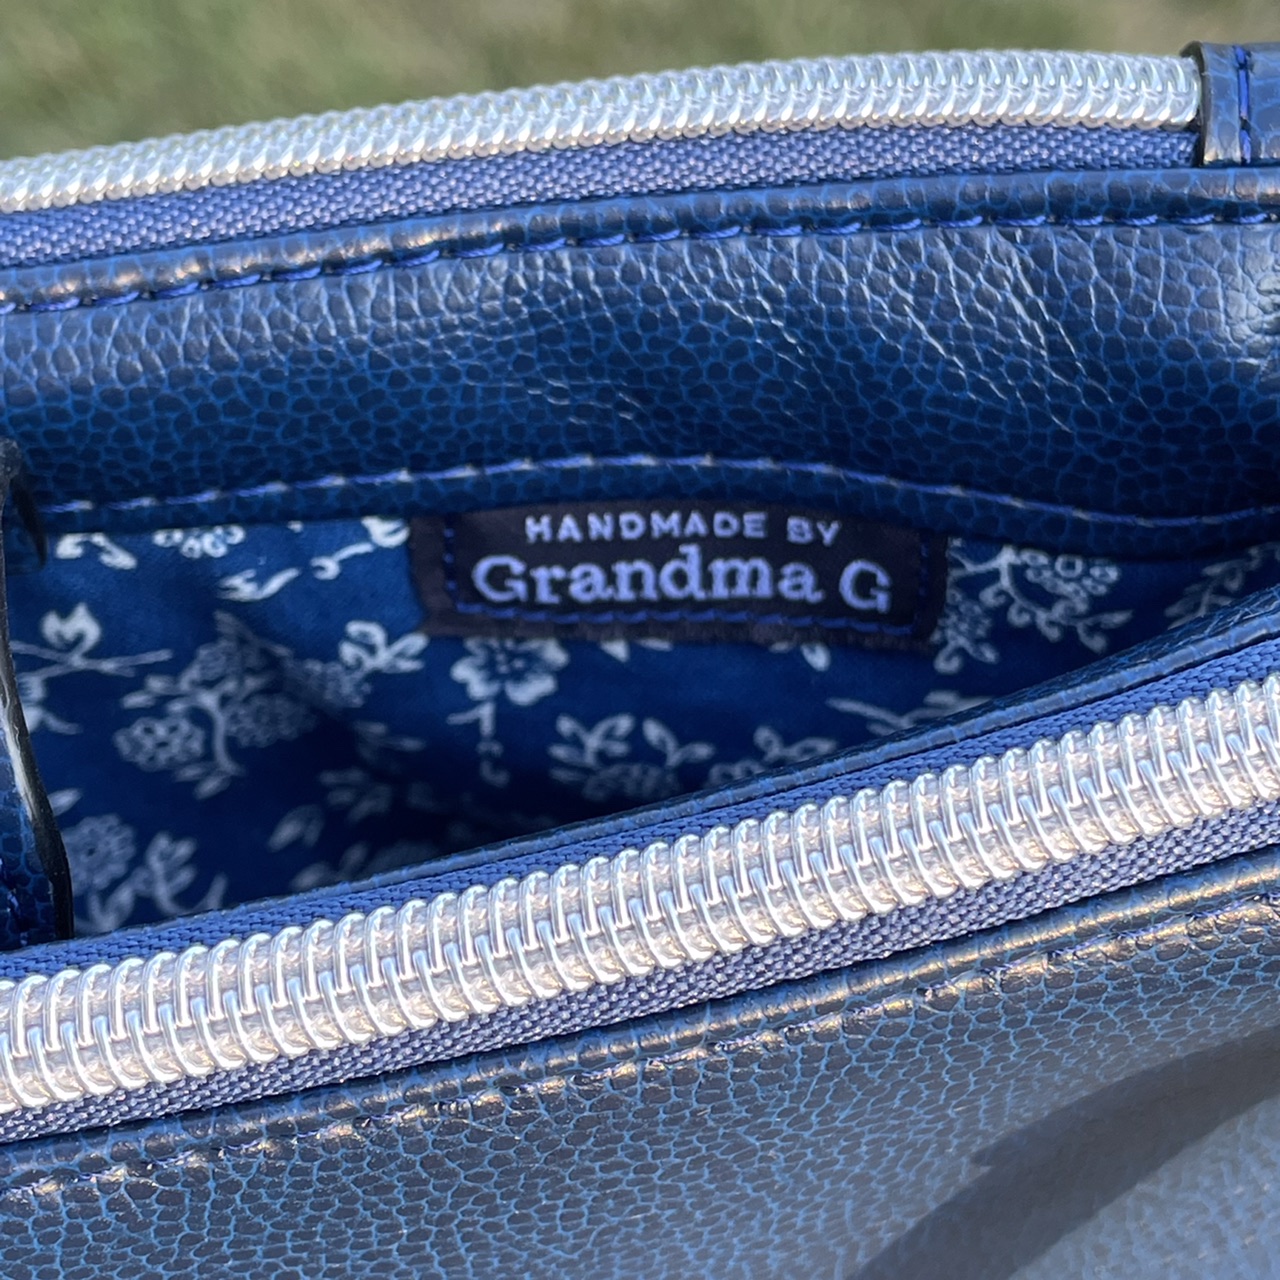
There’s an interior slip pocket, and I even remembered to add my label (for a change).


As always, Wonder Clips were a necessity. Mine are getting kind of old and have had a lot of use, and I’ve been breaking one after another lately, so I bought some new ones from Amazon. They are not official Wonder Clips, but they seem just as good. In these two pics they’re holding down the binding.


Below is the result using Shannon’s method. I have to say, it’s the best I’ve ever had binding turn out! I’m so pleased, and I’ll definitely be using that method on any future projects with binding.


Here’s a closer look.


Nice, huh?


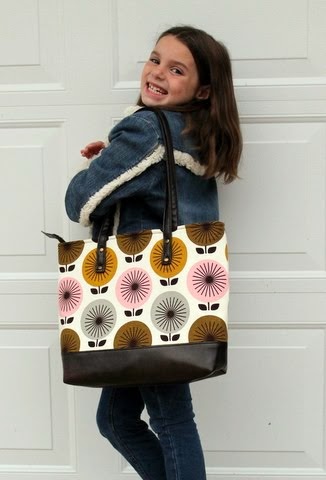
The bag has a slightly taller back than what the front is, to give it a nicer shape when worn. It has darts in the outer pocket, so there’s plenty of room to slide your phone and/or whatever inside. Yet it’s deep enough that nothing’s apt to fall out.


It can be worn on front or back, and there’s a D-ring at each side of the back bottom so it can be worn on the left or right side, per the wearer’s preference. Here are a couple pics of me with it on the front (taking pics of it on my back were too challenging!). 


It’s bigger than something I would wear on the front, but some people like the convenience of it being right there with their phone so handy. I can also see how it would be nice to use on one’s back.

The sewing pattern can be found here. If you like this one that I made, it’s available for purchase. Just send me an email via the link on my sidebar. I do have to say that it’s a very sturdy bag, especially with that foam in there; it actually feels like a piece of luggage. I wish I had a use for it!

That’s all I’ve sewn in the last few months, other than a couple of very quick, very little items. I’ll show you in my next post (and I won’t wait 5 months to do it!). Also, Courtney sewed some Christmas gifts, and I’ll post them, too. She did a great job! So I’ll be back. Once more, at least. After that, we’ll see. But I do have another pattern test coming up very soon, sooooo……    

Monday, August 28, 2023

Aries Crossbody Bag

When I first saw a sample of this bag, before the pattern was even released, I thought that it would be the perfect purse for me! I bought the pattern at a discount on launch day, which was months ago. Then came the part that often takes me the longest… deciding fabrics, etc. It was mulling in my mind as I made all the rayon garments. I’d gotten some luscious vinyl in a grab box, and since it was blue, I knew I wanted to use that. I had several choices for linings, and as I was sorting fabrics in my old sewing room, I kept finding more possibilities so I kept changing my mind. 🥴

The hardest decision was what to put on the front of the bag for a trim. I did a lot of searching and finally settled on ribbons. I ordered three different blue ones from an Etsy shop. They were all beautiful, and with lots of thought plus some consultation from Jess, I/we decided this combo of two of them would be just right. 

So here’s my new purse, the Aries Crossbody Bag, from the pattern by Knotted Threads Co. It turned out just as I had pictured it, and I LOVE it!


It has three zippered pockets… one on each side plus one in the center gusset area which is held closed by a tab with a magnetic snap. So there are plenty of options for organizing all the things. That center area should be ideal for keeping a phone handy.


Here are some close-up details. I am still thrilled with how my new Sailrite sewing machine does topstitching!


I think that little flower zipper pull is going to go. As Jess said, it’s too “cute” to really go with the elegant flowers on the ribbon.

I even remembered to add my tag. It wasn’t necessary, since the bag is for myself and I know who made it, but I like it there (and I still have a couple hundred of them to use up!). 🙂


The pattern was excellent, very detailed with lots of good tips, and it had an accompanying video which was also great. I followed it pretty much to the letter because I wanted it to be as perfect as possible.

I did take just a few pics along the way. Below are the D-ring tabs and the snap tab that holds the center pouch closed. I was in the process of edge-painting them. I used 3 coats of base coat and 2 coats of color. It was very quick to do but did require some drying time between coats.


Here’s my Sailrite machine at work on the topstitching. I used the left zipper foot, and underneath it here is just a makeshift fabric “hump jumper” to keep the zipper foot level with the center foot (necessary to prevent skipped stitches).


Beautiful result, right?


Everything went very smoothly (if you don’t count running out of bobbin thread on the strap… I had even checked it first, but I forget that because the thread is thicker, there’s not as much left on the bobbin as it looks like 🙄). The scariest part was sewing on that ribbon, because it needed to be right the first time around. I used double-sided tape to secure it first, and the walking foot did the rest of the job to perfection. Yay!


It’s a smallish bag, which is what I like nowadays. I don’t feel the need to carry the kitchen sink along anymore. You can get an idea of its size here.


I love it (have I said that already?) and can’t wait to take it on its first outing! I also loved the pattern. It gave my brain a bit of a workout, mainly in keeping my pieces straight so I didn’t mix things up with those two outer pockets, but exercise is good! I’d happily make another bag like this someday, too.